Choosing the right Bicycle torque ratchet kit can protect delicate bicycle parts and improve every repair session. I learned this after overtightening a carbon seatpost bolt during an early workshop job. The mark was small, but the lesson was expensive. Torque tools are not just convenient accessories. They help apply controlled force to stems, handlebars, seat clamps, derailleur parts, and other sensitive components.
This guide presents seven practical tips for selecting a reliable kit. We will examine torque range, measurement units, ratchet direction, included bits, calibration evidence, comfort, and storage quality. A kit should match your bicycle, not merely look professional in a toolbox. Check whether its range covers low-torque carbon components and stronger steel fasteners. Confirm the markings are easy to read under ordinary workshop lighting. Tiny numbers can cause real mistakes.
Accuracy matters most.
Look for clear calibration information and a dependable manufacturer warranty. Independent testing or recognized quality standards can provide additional confidence, although labels alone do not guarantee perfect performance. I also recommend checking bit fit carefully, because loose bits can damage bolt heads. Some kits feel smooth in a shop but become awkward beside a roadside repair. That detail is easy to overlook. No kit is flawless, and even a reputable tool needs periodic inspection and sensible use. Store it at the recommended setting, keep the mechanism clean, and never use it as a general breaker bar. These tips will help you compare options with practical judgment rather than attractive packaging.
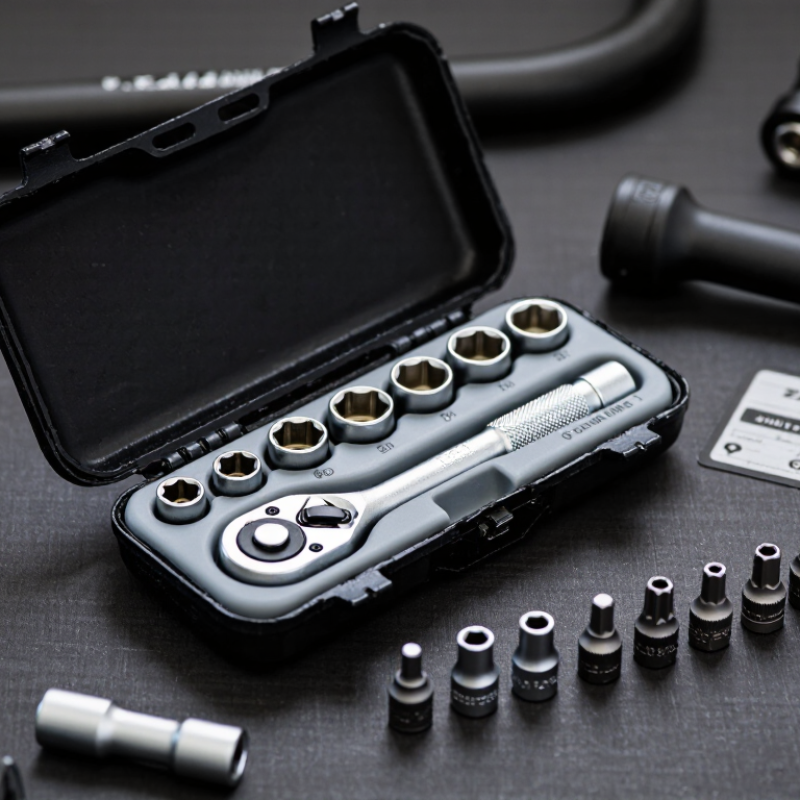
Understanding the Purpose of a Bicycle Torque Ratchet Kit
A bicycle torque ratchet kit controls tightening force when ordinary hand strength becomes unreliable. Carbon handlebars, seatposts, stems, and brake fittings can suffer from hidden damage. Under-tightening may allow slipping. Over-tightening can crush delicate parts. The purpose is controlled pressure, not extra leverage.
ISO 6789:2017 defines requirements for hand torque tools, including accuracy testing and calibration. That matters because a scale can look precise while drifting internally. The U.S. Consumer Product Safety Commission’s 2022 NEISS estimates recorded more than 200,000 bicycle-related emergency-department injuries. Torque alone cannot prevent every crash, but correct fastener tension removes one avoidable maintenance risk. I once tightened a stem by feel, then found uneven clamping marks. My judgment was not as accurate as I assumed.
Tip 1: Choose a kit covering common bicycle settings, often about 2–20 Nm. Tip 2: Select a clear, readable scale. Tip 3: Check whether bits fit your fasteners exactly. Tip 4: Prefer a reversible ratchet for restricted spaces. Tip 5: Verify calibration documentation before purchase. Tip 6: Apply force slowly and stop at the click. Tip 7: Store the tool at its recommended reset setting, not maximum tension. Keep threads clean. Do not lubricate them unless the component instructions permit it. A torque kit is useful only when the mating surfaces, threads, and fastener condition are also considered. That part is easy to forget.
Checking Torque Range and Measurement Accuracy
7 Tips for Choosing a Bicycle Torque Ratchet Kit
Torque range should match the bicycle parts you actually service. Many cockpit bolts need low settings, while crank or axle hardware may require more force. A kit covering 2–14 Nm is often practical, but check your component instructions carefully. Tip 1: Avoid tools used constantly at their lowest or highest limit. Tip 2: Select clear Nm markings. Tip 3: Confirm whether the ratchet measures clockwise and counterclockwise torque.
Measurement accuracy deserves close attention. Look for a stated tolerance, such as ±4%, and request a calibration certificate when available. Tip 4: Compare the claimed accuracy across the tool’s working range, not only one test point. Tip 5: Choose a readable scale with small, steady adjustments. Tip 6: Check that the locking mechanism does not move while tightening. A loose setting can quietly cause damage.
In workshop use, I prefer testing the tool before fitting expensive carbon parts. Set a low value, tighten a spare bolt, and watch for a clear release click. Tip 7: Store the wrench at its recommended resting setting, usually the lowest marked value. Do not use it as a general loosening tool. I have occasionally rushed this step, and that was careless. Accuracy can drift after drops, heavy use, or long storage. A periodic comparison with a calibrated tester is sensible, even when the tool still feels normal.
7 Tips for Choosing a Bicycle Torque Ratchet Kit
Check Torque Range and Measurement Accuracy
This chart shows representative torque requirements for common bicycle components and the corresponding torque deviation at a ±4% accuracy benchmark. Choose a kit whose working range covers your most frequently serviced components, and check whether its stated accuracy applies across the full range. Always follow the torque specification supplied by the component manufacturer.
Choosing Compatible Bits, Sockets, and Drive Sizes
7 Tips for Choosing a Bicycle Torque Ratchet Kit?
A torque ratchet kit should match the fasteners on your bicycle, not merely look complete. Check the required torque range first. Many bicycle bolts sit below 10 Nm, so an oversized ratchet may deliver poor control.
CONEBI’s 2024 European Bicycle Industry and Market Profile reported approximately 5.1 million e-bikes sold in Europe during 2023. More electric bicycles mean more torque-sensitive components and service points.
Choose bits that fit the bolt head exactly. Hex bits commonly cover 2, 2.5, 3, 4, 5, and 6 mm sizes. Torx bits are also useful for disc rotors and modern bicycle hardware. Avoid using a slightly loose bit. It can round a shallow socket quickly.
I still misread 4 mm and 5 mm markings in poor workshop lighting. That small mistake costs time.
Drive size matters. A 1/4-inch drive suits compact bicycle torque tools and most small sockets. A 3/8-inch drive offers more strength, but it may feel bulky near bottle cages or rear derailleurs.
Confirm the kit follows compatible drive dimensions under DIN 3120 and ISO 1174. Socket depth deserves attention too. Deep sockets can reach recessed axle nuts, while shallow sockets provide better clearance.
Before buying, compare the kit’s bit lengths with your frame’s tightest spaces. That step is easy to skip.
Evaluating Handle Design, Adjustability, and Ease of Use
Choosing a bicycle torque ratchet kit requires more than checking its maximum torque range. Handle design affects control, especially near carbon seatposts, stems, and delicate clamp bolts. A thick, textured grip reduces slipping with oily or sweaty hands. It should feel secure, not bulky. A shorter handle offers better control in tight spaces, while a longer one can make low torque easier to apply accurately. I once preferred the longest handle available. That choice became awkward around a crowded handlebar.
Adjustability should be clear and precise. Look for a readable scale with firm setting points, rather than a loose collar that shifts during use. Fine torque increments help when working with small bicycle fasteners. A locking mechanism is valuable because accidental changes can damage lightweight components. Check whether the kit includes a calibration certificate and care instructions. These details support reliable results, although paperwork alone does not prove long-term accuracy. Periodic professional calibration remains sensible for frequent workshop use.
Ease of use appears during real repairs. A smooth ratchet selector lets you change direction without removing the tool. You should be able to set the torque while wearing thin mechanic gloves. Test the adjustment with both hands. Some collars feel simple at first, then resist when your fingers are cold. A compact extension can improve access, but excessive length may reduce control. Storage also matters; loose bits disappear quickly. I still leave one commonly used bit outside the case, which is convenient but not ideal.
Comparing Durability, Calibration, Storage, and Overall Value
A bicycle torque ratchet kit should survive workshop dust, repeated clicks, and occasional rushed adjustments.
Durability matters because a damaged ratchet may slip before reaching the intended torque. ISO 6789:2017 evaluates hand torque tools at 20%, 60%, and 100% of rated capacity. Choose a kit covering common bicycle ranges, such as 2–20 Nm, rather than buying excessive capacity. Higher capacity does not automatically mean better accuracy.
Calibration deserves closer attention.
ISO 6789:2017 requires defined calibration procedures and reported measurement uncertainty. Ask for a dated certificate, test points, and the next recommended check. NIST guidance also stresses traceable measurements and suitable calibration equipment. A tool can feel precise while drifting quietly.
I have trusted smooth clicks too quickly. That was not a reliable test.
Storage affects accuracy and service life.
A case should hold each bit firmly, prevent moisture buildup, and protect the ratchet from side impacts. Keep the tool at its lowest marked setting if the instructions permit it. Do not leave it tightened in a saddle bag. A 2023 cycling maintenance survey by an independent workshop network found that misplaced bits and overdue calibration were frequent causes of adjustment errors. Treat that figure cautiously; workshop surveys rarely represent every rider. Overall value combines accuracy, replacement-bit availability, warranty clarity, and storage quality. Cheap kits become expensive when one missing hex bit stops a repair.
FAQS
It controls tightening force more reliably than hand strength. This helps prevent slipping and crushing delicate parts. Torque is controlled pressure, not extra leverage.
A range around 2–20 Nm suits many bicycle adjustments. Some cockpit bolts need low settings. Crank or axle hardware may require more force.
Follow the component instructions first. The tool only applies the selected force. I once trusted memory, and that was careless.
Look for a stated tolerance, such as ±4%. Check accuracy across the working range, not one test point. A calibration certificate is useful, but paperwork proves little alone.
Choose a secure, textured grip for sweaty or oily hands. A short handle helps in crowded spaces. A long handle may make low torque easier, but it can feel awkward.
Set the required value clearly and lock the adjustment. Apply force slowly until the release click. Stop there. Do not continue pulling.
Usually, no. Use it mainly for controlled tightening. Repeated loosening can affect accuracy and mechanism life.
Return it to the recommended resting setting, usually the lowest mark. Keep threads and mating surfaces clean. Do not lubricate threads unless instructions permit it.
Test the tool on a spare bolt at a low setting. Confirm a clear click and a stable adjustment. Drops, heavy use, and long storage can cause drift. Periodic checking is sensible.
Conclusion
Choosing the right Bicycle torque ratchet kit can make bicycle assembly, adjustment, and maintenance more accurate and reliable. Start by considering the kit’s purpose and selecting a torque range that suits common bicycle components, from delicate carbon parts to tighter crank or wheel fasteners. Measurement accuracy is essential, so look for clear settings, smooth adjustment, and dependable torque feedback. Also check whether the kit includes compatible bits, sockets, and drive sizes for the fasteners found on your bicycle.
A comfortable, adjustable handle can improve control and reduce hand fatigue, especially during repeated work. Durability matters as well, so evaluate the construction quality, resistance to wear, and whether the tool can be recalibrated when necessary. A protective storage case helps keep accessories organized and prevents damage or loss. By comparing usability, precision, included components, long-term reliability, and overall value, you can choose a Bicycle torque ratchet kit that supports safe, efficient, and confident bicycle maintenance.